![]()
|
|
Important Note:
If ZTERM is required to be reloaded on a PC for any reason, a “Re-registration” fee may apply.
Contact Rich Kay at the main office (800-747-9611) if any questions or concerns.
Installation:
Downloading the installer file:
∙ Using an internet browser, go to: http://www.datatronltd.com.
∙ Click on the “Downloads” button.
∙ Click on the link for “ZTERM for Windows”.
∙ Click “Download” if prompted to do so, and save the file in “My Destop”
Installing ZTERM:
∙ You should now have a file on your desktop called “zt144n.exe”.
∙ If you are a Windows Vista user, you must RIGHT click the file and choose “Run As Administrator”. Otherwise, just double click the icon.
∙ The ZTERM 2000 setup program should start up. Click “Next” to continue.
∙ Click “I accept the agreement”, then “Next”.
∙ On the “Select Destination” page, do not make any changes, just hit “Next”.
∙ On the “Select starup menu” page, do not make any changes, just hit “Next”.
∙ Click “Install”.
∙ Uncheck “README”, and Check “Launch application”, then click “Finish”.
∙ You should now see a Window with an icon labeled “Add Profile”.
You now have 30 days to try ZTERM in demo mode.
If you decide to keep ZTERM on this computer, contact the Datatron main office to activate the ZTERM License before the 30 days expires.
Setup a “profile”:
∙ Click on Start and navigate to: All Programs / Start / ZTERM / ZTERM 2000
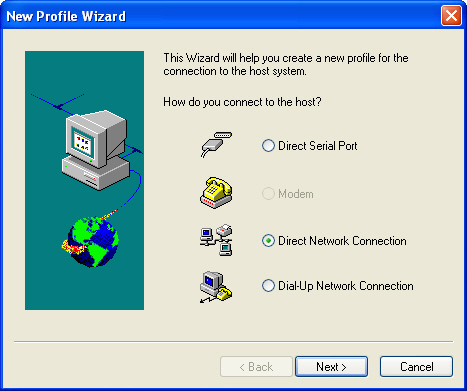
∙ Double-click on the “Add Profile” icon to set up a “connection profile”.
∙ Choose “Direct Network Connection” and click NEXT:
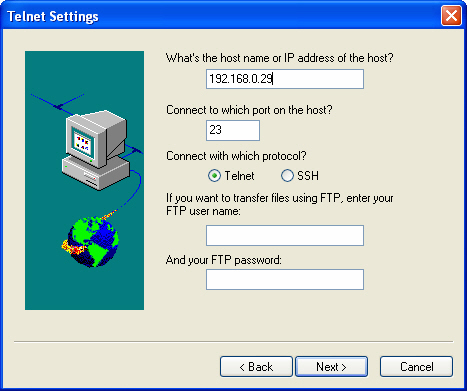
∙ The next screen is “Telnet Settings”. What you enter here will depend on how you will use
this profile to connect to the Datatron system:
Local connection: Connecting over the Internet:
∙ Host name: <local IP address of server> <public IP address of server location>
(usually 192.168.0.29)
∙ Port: 23 22 (see Protocol below)
∙ Protocol: Leave “Telnet” checked. Check “SSH” button.
(this will change port to 22)
∙ Leave the boxes for “FTP” blank for now.
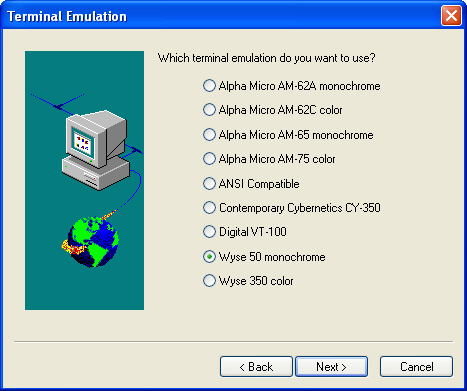
∙ Choose “wyse50 monochrome” for the emulation:
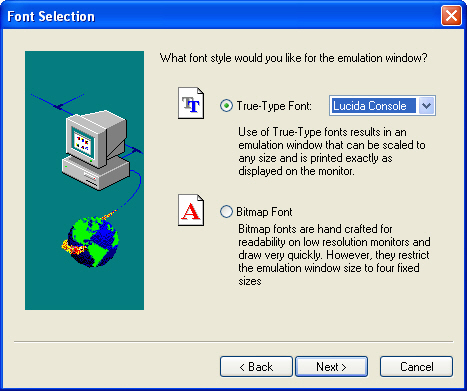
∙ Click on the small down-arrow and choose “Lucida Console” for the True-Type font to use:
∙ Name the profile. “Datatron” should be sufficient unless you will set up multiple profiles as
would be the case if you are using ZTERM on a notebook that will connect both in-house and
via the internet. In this case, you may want to label one “Datatron In-House” and one
“Datatron Via Internet”. Use whatever works for you.
∙ Check the box “Create a shortcut on the desktop”.
∙ Leave the box “Automatically connect when started” checked.
∙ Check the option “Global profile”.
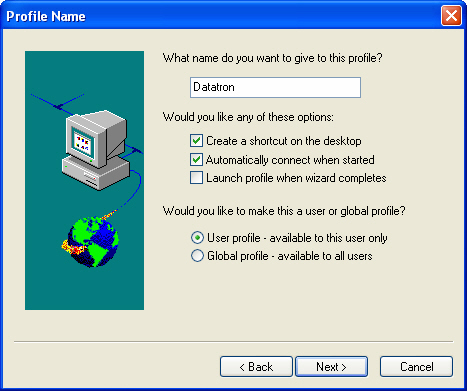
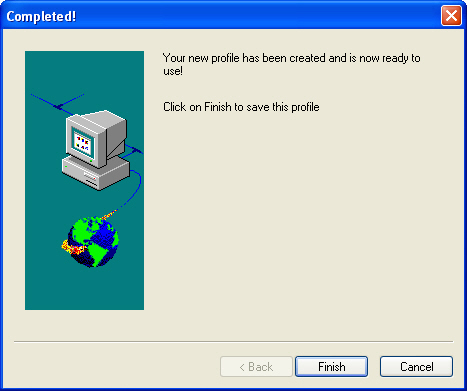
∙ Click “Finish” to complete the profile setup:
Again, you now have 30 days to try ZTERM in demo mode.
If you decide to keep ZTERM on this computer, contact the Datatron main office to activate the ZTERM License before the 30 days expires.
Using ZTERM:
∙ Once installed, double click on the new "Datatron" icon created on your desktop.
∙ You may move and resize the window to your liking.
∙ Double-clicking the top menu bar between the title on the left and the set of boxes on the right will bring it up to full-screen mode.
∙ Click on the “Configuration” menu and then “Options”.
∙ Check the box "Close on Telnet Close" (bottom box, left-hand side) and then OK as seen in the example below:
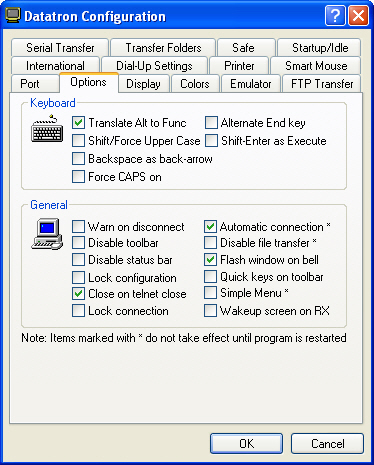
∙ At the top-left of the screen, click on the “Action” menu and then “Save Settings”.
∙ When using the SSH protocol, the first time you try connecting to a server, you will be prompted with a Security Warning message. (You won’t get it if you are using Telnet).
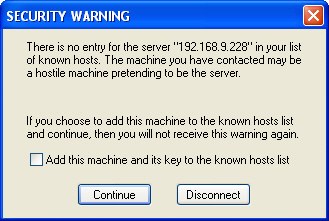
∙ Check the box that says, "Add this machine and its key to the known hosts list" and click “Continue”. If you don’t check the box before clicking “Continue”, you will get the message again the next time you try to connect.
∙ If you get an error message stating that the "known hosts file" does not exist, just click OK. You will only get that message the first time you connect to a server using SSH.
∙ You will then be prompted for SSH Authentication. Here you will type in your login name at the "User name" prompt, then type your password at the "Passphrase" prompt, and then click [OK].
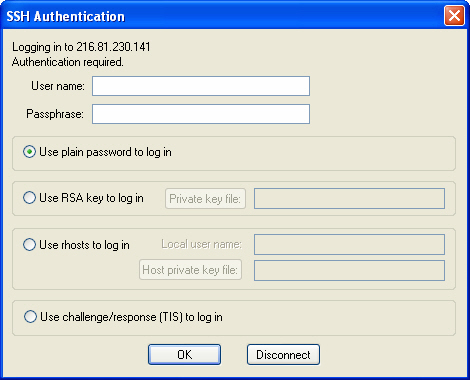
Note: Usernames and passwords will need to be configured prior to login. Contact Datatron Hardware Support (at the main office) for help setting them up.
Important Note:
DO NOT click on the red X in the upper right hand corner of the ZTERM window to close the window. When you wish to disconnect from Datatron and close the ZTERM window, simply following these instructions:
∙ <Left> arrow to the “dot” (the "IBM." or "LNX." prompt).
∙ Type the word “HOST” and then enter.
∙ If you have a flip-screen, do the same (back to the dot and type “HOST” and then enter).
Following this procedure will disconnect you from the Datatron system cleanly while closing your ZTERM window. If you just clicking the “red X”, this will simply close the ZTERM window, but the Datatron system will think that you are still logged-in.
Failure to do so can result in problems logging back into the system (using the same login) and/or file locking problems if you did not clear any exclusive file locks you had when exiting.
For more information on ZTERM, feel free to check out their site at: www.coolstf.com